
Create a Loop in Looplet
Open the Loop setup wizard
From your Looplet dashboard, select + Create Your Loop! or + New Loop
Enter the Loop details
Enter the following details in the Loop setup wizard:
- Loop Name: this name will appear on the Loop. Pick something descriptive and recognizable.
- Loop Code: This must be a unique code. People will use this code to access your loop, and it will be part of the Loop URL.
- It must be 4-12 characters and contain only letters and/or numbers. Special characters and spaces are not allowed.
- Choose a Loop Code that is easy for your group to remember and spell.
- You can change the Loop Code at any time.
- Access Control: decide who can access the Loop
- Public: anyone with the code or link can access the Loop.
- This is useful for Loops that contain publicly available information or information you want anyone to be able to find without needing a Looplet account.
- For example: public events, small business information, local clubs or community groups open to the public.
- Do not put any information in a public Loop that you would not want on a public website.
- Protected: people must have the code or URL and an additional passphrase to access the Loop.
- This is useful for Loops that should not be open to the public but should also not require a Looplet account to access.
- For example: schools, sports teams, families
- You can change the Loop Passphrase at any time.
- Private: only certain people are allowed access to the Loop, and they must have a Looplet account.
- This option is not yet available in beta.
- You can change the Loop Access Control at any time.
- Public: anyone with the code or link can access the Loop.
- Description: Describe the Loop - who is it for and what kind of information will it have? The AI assistant uses this information to personalize your Loop chat.
Add files to your Loop
The information in these files will create your Loop Library, or the information the AI assistant will use to create notes and answer questions in the Loop.
- You may add files from your computer or create a new Text Document directly in Looplet.
- Accepted file types are: PDF, DOC, PPT, XLS, and Text files.
- You can change the content of your Loop Library at any time.
To learn more about Loop Libraries, visit Loop Library Tips and Tricks.
Create notes
Notes are quick summaries or announcements. You can write them yourself or ask the AI assistant to write them for you.
Example Notes
Here's an example AI Generated Note:
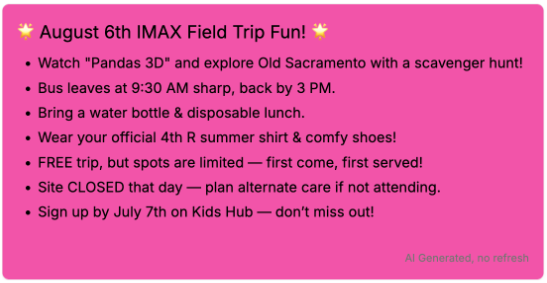
Here's an example Hand Written Note:
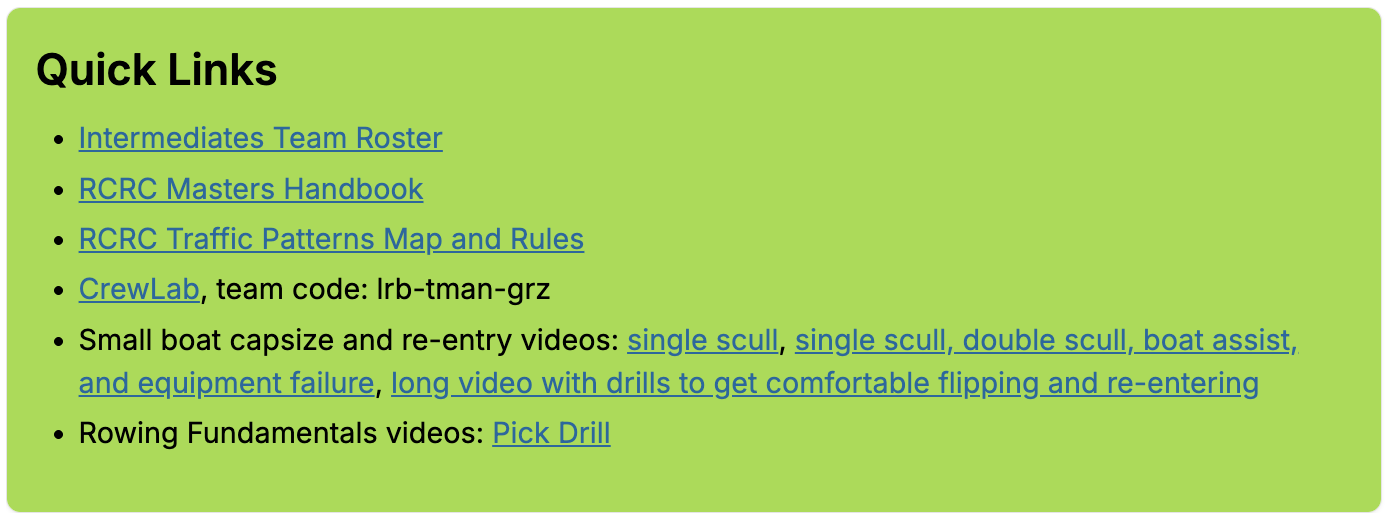
To see more example notes, visit Notes Tips and Tricks.
Create an AI-generated Note
- Select + Create AI Generated Note or + Create Note then AI Generated Note.
- In the Generate AI Note section, enter text in the Prompt for AI field. This tells the AI assistant what to put in the note. You can also ask for specific tones. Here are some example prompts:
- Summarize upcoming events for this month and next with fun emojis.
- Make a note with all the dates school is closed this year.
- Summarize the key action items that need to be completed before the next meeting in a professional tone.
- Click Generate Content. The AI assistant will pull the applicable information from your Loop Library to create a custom note.
- View the note. If you like it, great! Move on to the next step. If you want changes, you can:
- Click Generate Content again. The AI assistant will try again.
- Update your prompt, then click Generate Content again. For example, you may want to include specific information in the prompt that the note should contain.
- Click Edit to edit the note directly.
- Note that if you edit information in an AI-generated note and the note is set to automatically refresh, your edits will be lost when the note regenerates next.
- Select the Refresh Frequency you prefer. This specifies how often the AI assistant will automatically regenerate your note.
Choose from:- Update Daily (Each Morning)
- Great for detailed info that changes daily, such as appointments, events, to-dos, action items, and activities
- Update Weekly (On Sunday Mornings)
- Great for higher-level information that changes weekly, such as menus, schedules, and chores
- Update Monthly (On the 1st)
- Great for high-level information that changes monthly, such as monthly snap-shots, holidays, birthdays and anniversaries
- Never
- Great for one-off notes or information that you want to stay exactly as-is.
- Update Daily (Each Morning)
- Optional: add links. These will not regenerate and will always display in your note.
- Optional: Choose a Start Date and/or End Date for your note.
- This is useful if you are planning out your notes in advance or there is a specific end date for your note.
- If you do not choose a start date, the note will start now.
- If you do not choose an end date, the note will show until you manually remove it.
- Click Save Note.
Create a Hand Written Note
- Select + Create Hand Written Note or + Create Note then Hand Written Note.
- Write or copy/paste your note text into the box.
- Add images (optional). This image will display in your note.
- Add the image URL into the Image URL field.
- Add links (optional). These links will display at the end of your note.
- If there is a link you'd like to appear in your note, input the URL and a name to display in the hyperlink.
- Click + to add the link. If you do not click +, the link will not be saved.
- Note that you can also add a url directly in the note and click the "link" icon in the editor menu to turn it into a hyperlink. You must input the link URL in the pop-up.
- Optional: choose a Start Date and/or End Date for your note.
- This is useful if you are planning out your notes in advance or there is a specific end date for your note.
- If you do not choose a start date, the note will start now.
- If you do not choose an end date, the note will show until you manually remove it.
- Click Save Note.
Rearrange Notes
- Drag and drop notes to rearrange the order.
- Click Next.
Customize your Loop icon and color
Select from the available icons and colors.
- Note that custom icons and colors are not available in beta.
Complete
Click Complete.
You can now see your Loop in the Dashboard.
Final Steps
- Go through the New Loop Checklist to ensure your Loop is ready to go.
- Test your Loop to make sure it's working as expected. Ask questions you expect your group to ask and review the chatbot responses.
- If needed, edit your files to help the chatbot answer questions more directly or accurately.
- Send the Loop to your group. For more info, see Inviting users with a code.